Authoring Instructions
The content Editor of this blog is Curt Wechsler.
Email technical problems or questions to; info@firejohnyoo.net
The "501c3" "non-profit status" of our "fiscal sponsor" bars this website from endorsing political parties and candidates.
Login:
Create a new entry or
Instructions for Login and Entry Composing, Categorizing, Publishing, Editing your "Entries"
It is essential to understand as an Author on this blog, blogs are usually a reverse chronological list of "Entries". The most recent post is at the top of the list. There is a limit on how many "Entries" are displayed on the homepage. Once "Entries" are pushed off the bottom of the list (as new entries are added to the top), they can only be found in monthly archives and within the "Categories" navigation in the sidebar. Please pay careful attention to the Categories section of the instructions below or your posts may not be found.
Login
- When you click the links above (or if you have them bookmarked in your web browser), you will first go to a login screen. Your username is your first and last name with a space in-between and the first letters capitalized as usual. Your password is the email address you use with the Fire John Yoo Coalition.
Point of View for writing. Who is the audience?
- Keep any or all of three audiences in mind: 1. People advanced on the subject of John Yoo advanced or NLG types, 2. Reporters and the press, 3. the great uniformed public. You could take a personal tone or a generic information presentation.
Composing
It is strongly advised to not to compose your entry in the web browser but in MSword or your favorite text editor to spell check and save a copy. Then copy and paste it into the "Entry" "Body".
- There is a handle at the bottom of the "Entry" editor) that lest you grab and pull with your mouse to enlarge the area to compose.
- The "Create Entry" screen has two sections on the left and right side with stuff you must do or areas to leave alone. This is not so different from web email. On the left starting at the top:
- Create a title.
- Leave the "Format" pull-down alone.
- BODY and EXTENDED tabs are between the Title field and the button bar. It is important to split your entry so we have a brief chunk followed by a "read more" link on the homepage. The link goes to your complete article which includes that first brief chunk sewn together with the rest.
- BODY: The text you put here will be the brief chunk that appears on the homepage. It is good to put any introductory information here. You can just use the first 40 to 60 words or a synopsis.
- EXTENDED: Put the rest of your article here. Don't repeat what you put in the BODY tab section. The two parts are sewn together on the entry's webpage.
- Create your Entry using the formatting buttons in the editor. Then you can do some formatting and make some links with the editor buttons.
- If are HTML saavy, click the <A> button on the far right of the editor button bar.
- Don't click the "Save" button yet.
- In the right hand column, leave everything alone except (see below)
Publishing
Publishing > "Status" pull-down menu button
- Select either "Published" or "Unpublished (Draft)". Leave the "Scheduled" option alone. This menu determines what happens when you click save. If you select "Published" and then click the "Save" button, your "Entry" will be instantly published to the public homepage of firejohnyoo.net. If you select "Unpublished (Draft)", your work will NOT go up on the public website. It will be saved for safety, further editing and future publication.
Categorizing
Categories
Selecting "Categories" automatically generates the navigation links for the blog website. The Webmaster creates these "Categories" in conjunction with the Coordinating group
If you don't follow the instruction for Categorizing your entries, your work will not be found by people searching this website.
- There are two kinds of "Categories" you must check off select.
1. Everyone in this Coalition is on a Committee AKA "Group". These Groups are listed in the "Categories" as ACADEMIA Group, GOVERNMENT Group, LAW Group, MEDIA Group, TRIBUNAL Group. You need to select the group you are part of. Each Group can thus have its postings found in a separate section of the blog.
2. Categories not followed by the word "Group" are the Topics we are organizing this blog under. If you are writing about the history and organization of Tribunals - or discussing how we are going to do our Tribunal, "Tribunal" the Category you want to select
(You can add and change "Categories" later if you choose to edit an "Entry" you have composed and saved.)
- Now you are ready to click the "Save" Button.
Instructions for Editing or Publishing a Saved Entry
If you have created and saved an Entry as "Unpublished" and are ready to go back to it and make changes or publish it, go to click the "Edit your entries" link near the top of this page. Login in and you will be taken to a page listing Entries on the firejohnyoo.net blog. "Unpublished" Entries are flagged on the left with a small yellow pencil. Published entries have a green bullet. Click on your "Unpublished" entry title to make changes.
- To "Publish" an "Unpublished (Draft)", on the right side under "Publishing" next to "Status", change the pull-down menu button to "Published" and click the "Save" button on the bottom left.
Deleting Posts
To have a post deleted, email: info@firejohnyoo.net
Instructions for Including a Picture in Your Post
Check the size of your picture and re-size if necessary. To check and re-size your picture, open it in an image editor. For this simple example, I will use iPhoto which comes on the Mac. Bring your picture into iPhoto and select the "File" pull-down menu and select "Export". Select "File Export" from the three tabs at the top. For "Format" select JPG (aka jpeg). For size, if the number in the "width" box is over 500, place a number in the box 500 pixels or smaller. Anything larger that 500 will be cut off on firejohnyoo.net. The vertical dimension of your photo will be changed automatically to maintain proportions. Under "Name" select "Use filename" and "Use extension" and save.
Getting the picture into your post. Compose the text of your entry and place the mouse cursor on a separate line in your posting where you want the picture to go. (Placing an image within a paragraph with text wrapping is nice but it may take you some work to get it right.) Now click the "Insert Image" button. This is the fourth button from the right in the toolbar at the top or your editor window.
Your screen will turn gray, (you will see a circular processing image in the center and then) and the "Insert Image" dialog box appears in the center.
- Click "Upload New Image"
- Click "Choose File"
- Locate your image and select it
- In the "Upload Destination" next to the "Site Root" Button, type this: media/images
- Click the "Upload" button
Now you are in the "File Options" dialog (for this simple example)
- You can leave the "Name" "Description" "Tags" boxes as is
- Check "Display image in entry"
- Uncheck "Use thumbnail..." and "Link image..."
- Select either "Left", "Center" or "Right" for the placement of your image
- Click "Finish"
Below, you can see I selected "Center" for this small example.

Instructions for Commenting COMING SOON
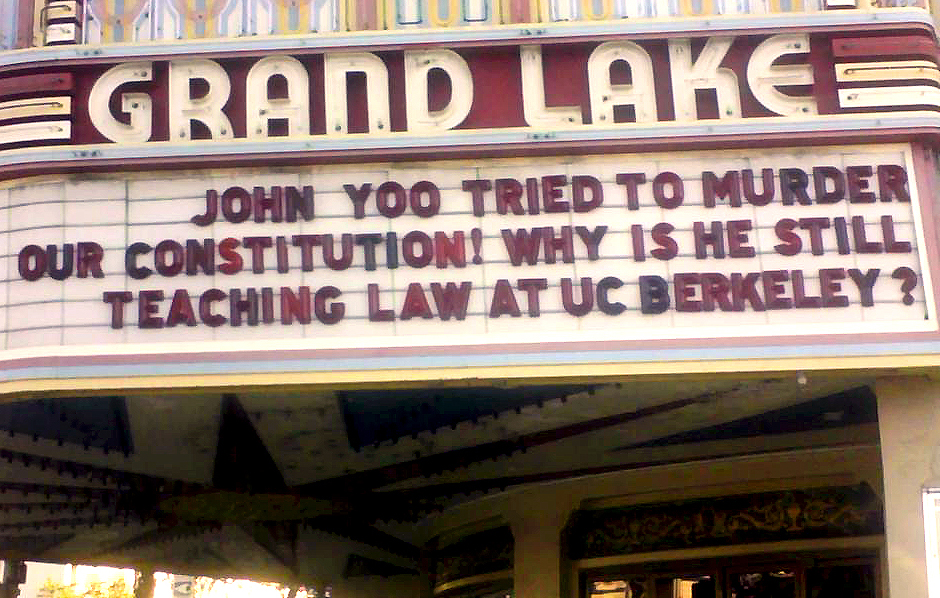
UC Berkeley Billboard

Donations via PayPal
are not tax deductible.

Events & Calendars
Important Reading
Physicians for Human RightsBroken Laws, Broken Lives
NLG White Paper
ON THE LAW OF TORTURE...
The President's Executioner
Detention and torture in Guantanamo